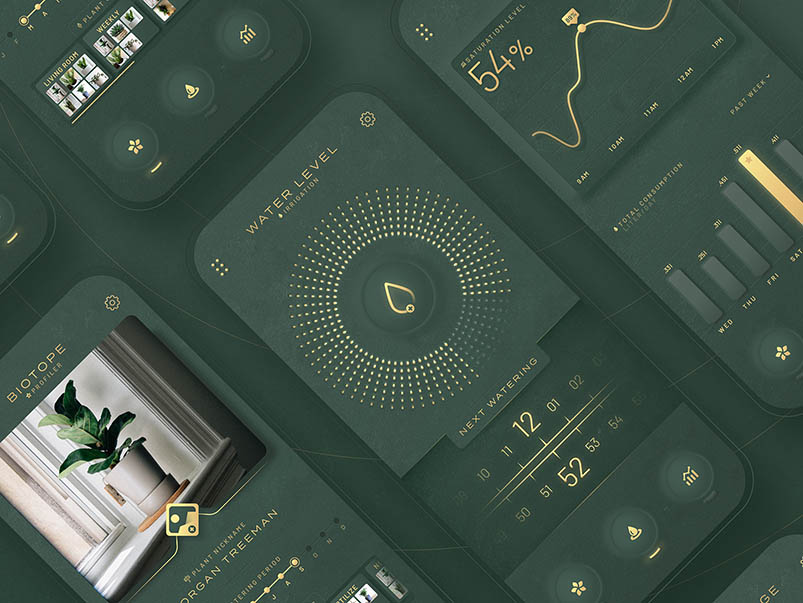
Reducing unnecessary heating by improving user awareness and control of heater usage, and enhancing comfort and efficiency with customized schedules.
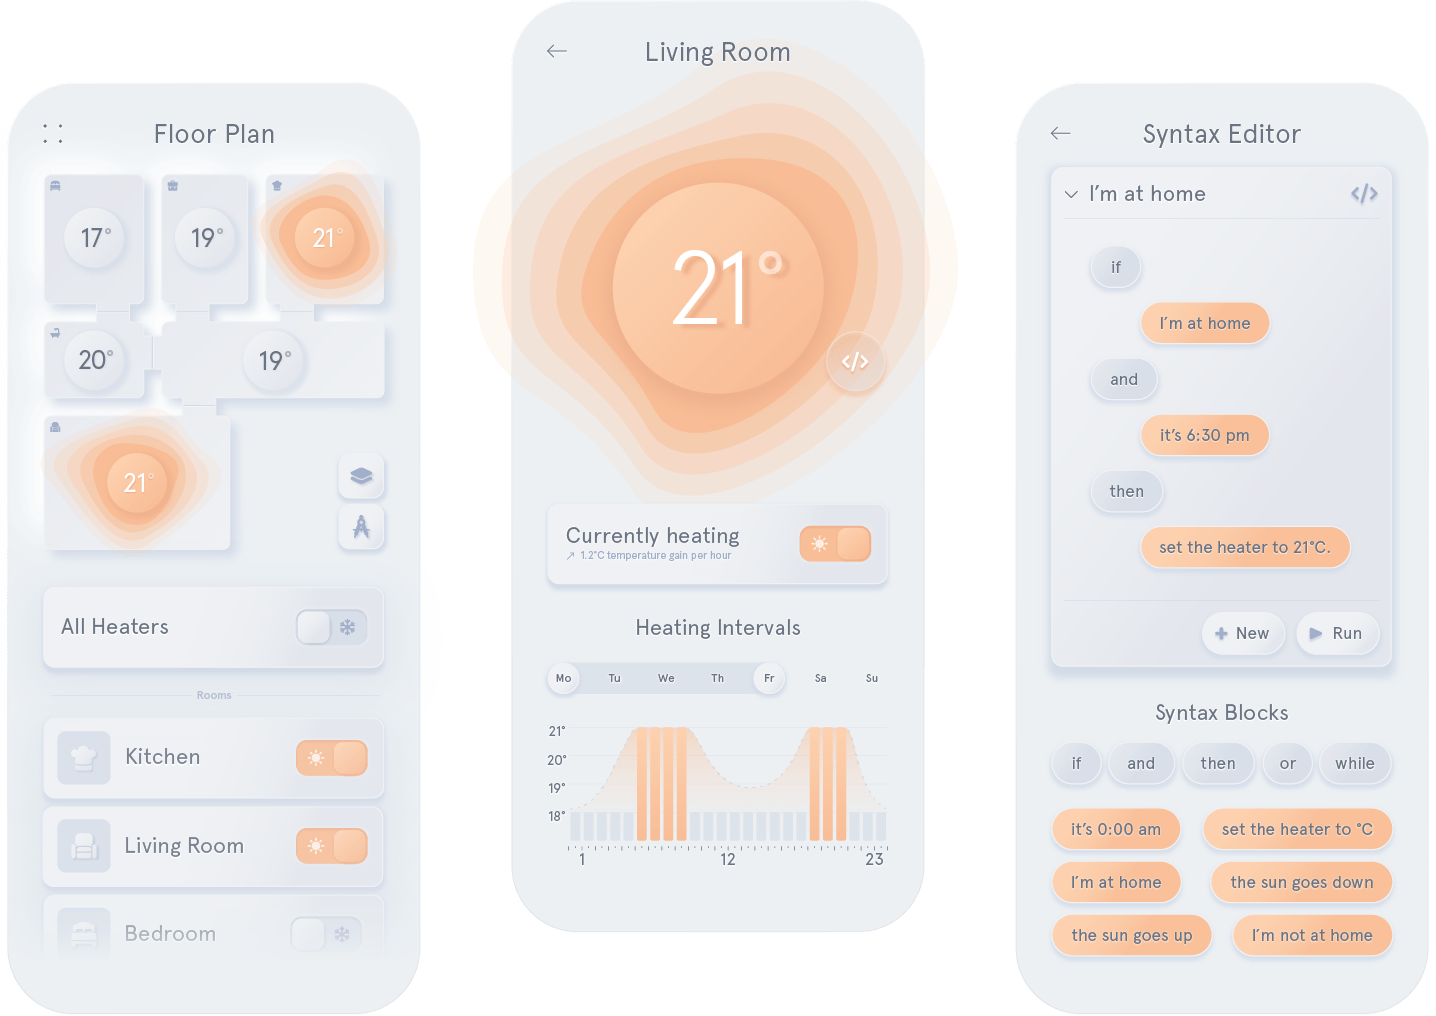
The goal: not having to think about heating ever again.
What began as a simple quest to find the perfect moment to heat my bathroom in the morning quickly turned into a deep exploration of how we perceive temperature – and what we might expect from technology in the future. As I studied how heaters work, I discovered that while their design is impressively clever, there's still plenty of room to innovate. This is especially true when paired with modern advances like machine learning and AI-powered decision-making, areas that even today's smart heating solutions haven't fully tapped into yet.

Enjoying warmth can take many forms and is not inherently human.
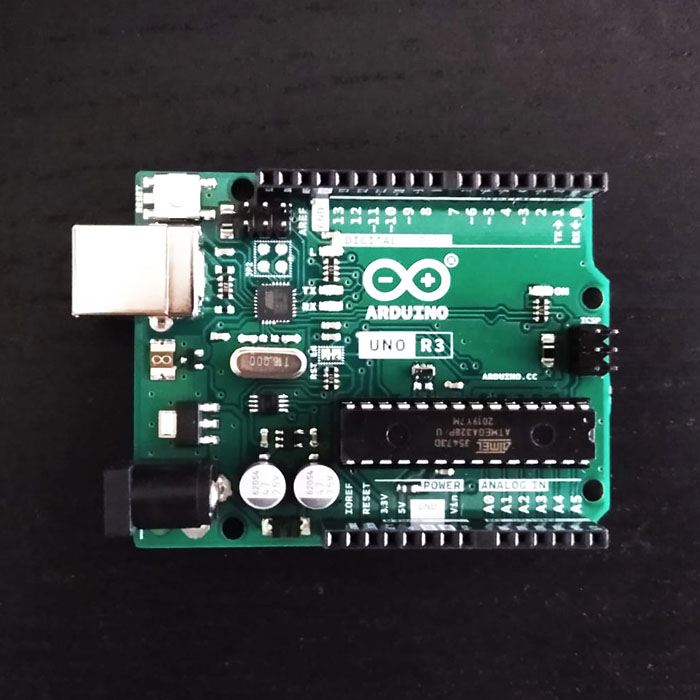
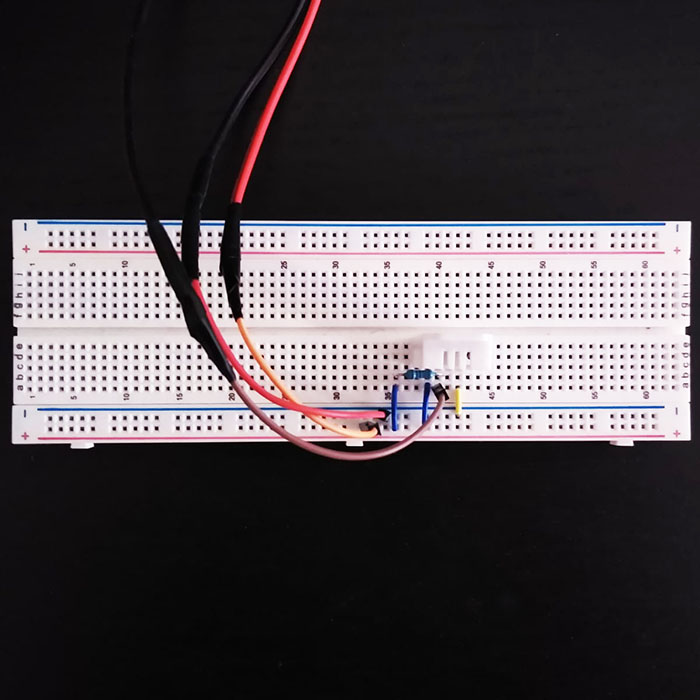
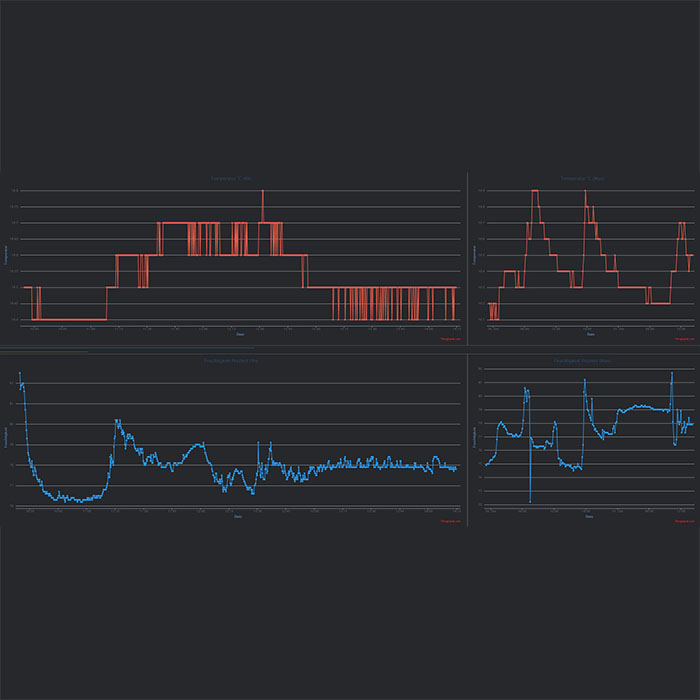
To measure how quickly my bathroom heats up, I built a small sensor
setup using an Arduino Uno and a temperature & humidity sensor, later
adding an ESP8266 for wireless data transmission.
I logged real-time data to
thingspeak.com and
visualized temperature and humidity separately in two graphs, each
spanning periods of 4 and 48 hours.
After about two weeks of data collection, I found that, on average,
the bathroom warmed by roughly 1°C every two hours. Placing towels
over the heater slowed heating time by approximately 30%.
Without any heating, the bathroom naturally stayed around 19°C,
meaning it took about six hours to reach a comfortable 22°C.
Although humidity wasn't the main focus of this study, the data could
offer valuable insights for future work, especially given humidity's
role in how we perceive temperature.
Heaters and thermostats are already ingeniously designed, so why bother improving them? Here's what users shared about the problems they face.
- heaters are often running unnecessarily long
- existing solutions can turn the heater on or off at a certain time but don't assist in reaching a desired temperature at a precise time
- without additional technology, there is no overview of temperatures/heaters in rooms
- there is no indication of how much time is needed to heat a room up to a certain temperature
- there is no indication of how the temperature behaves over time (gain/loss ratio)
- heaters don't adapt to personal schedules/routines
First patented in 1895 by Warren Johnson as a
"Heat Regulating Apparatus", the mechanical thermostat addressed a problem that still persists
today. Thanks to its clever design, the fundamental functionality
hasn't needed major changes in over a century. While the original
mechanism stands as a timeless example of excellent engineering,
today's adaptations haven't fully realized their potential yet.
When gathering user feedback about the current state of heaters,
most complaints revolved around the lack of modern, data-driven
technologies. People shared that heaters often run unnecessarily long. Why?
Usually because there's no easy way to know exactly how long it takes
to reach a desired temperature (for example, warming your bathroom in
the morning), causing users to leave the heater running longer than
needed. Sometimes it's as simple as human forgetfulness – "Did I turn
off the heater?"
Another common frustration was the lack of visibility into
heater status. Just knowing which heaters are currently on would boost
awareness and significantly reduce unnecessary energy consumption.
This would not only benefit the environment but also save money.
Having the flexibility to independently control each room remotely
further amplifies these benefits.
In short, users want to spend less time thinking about their
heaters while still getting maximum comfort and efficiency.
To better understand what users actually need from a solution that offers more control over their heaters, I created user stories.
As a user...
- I want to check the temperature of a room even when I'm not in the room.
- I want to know how fast a room heats up.
- I want the room to be the desired temperature when I enter it.
- I want to save money and the environment.
- I want to set flexible heating schedules/routines.
- I want to control the temperature of every room.
- I want to avoid unnecessary heating.
- I want to see how the temperature has been changing over time.
Based on user feedback, user stories, and my own ideas, I then created a set of potential features.
- Room Overview
- Floor plan with temperatures
- Floor plan options (floors, create plan)
- Switch on/off all rooms
- List of rooms with switches
- Room View (detail)
- Room temperature
- Room switch
- Routine configurator
- Heating intervals
- Routine Configurator
- List of routines (select)
- Routine editor
- Routine options
Brainstorming potential features and arranging them based on their fit within the overall information architecture quickly provides a detailed vision of the final product. While I typically start with rough wireframes, I prefer this approach early on because it lets me add, remove, and rearrange features rapidly – essential at this stage, where ideas flow quickly and capturing them promptly matters most.
Ideate, Prototype, Test – Rinse & Repeat
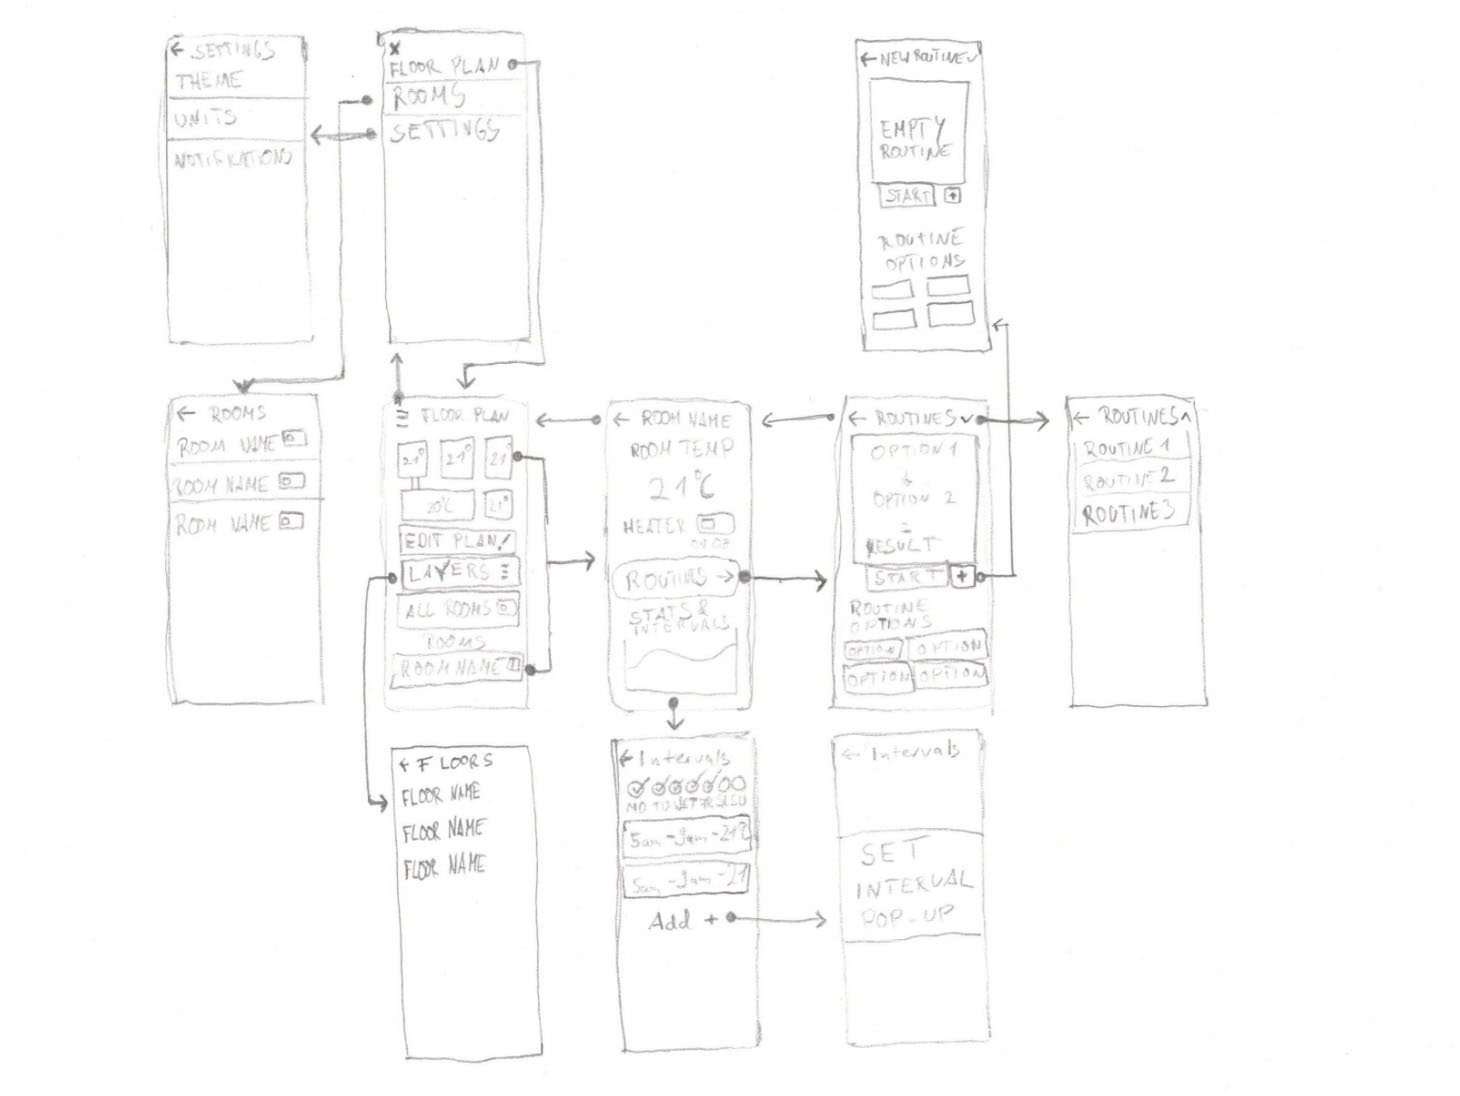
The first very rough and quick sketches to get a very
"top-view"-style feeling for how the app could look and navigate.
Usually I draw these just for myself although I sometimes use them
to gather additional user and/or stakeholder feedback before heading
into the next stage.
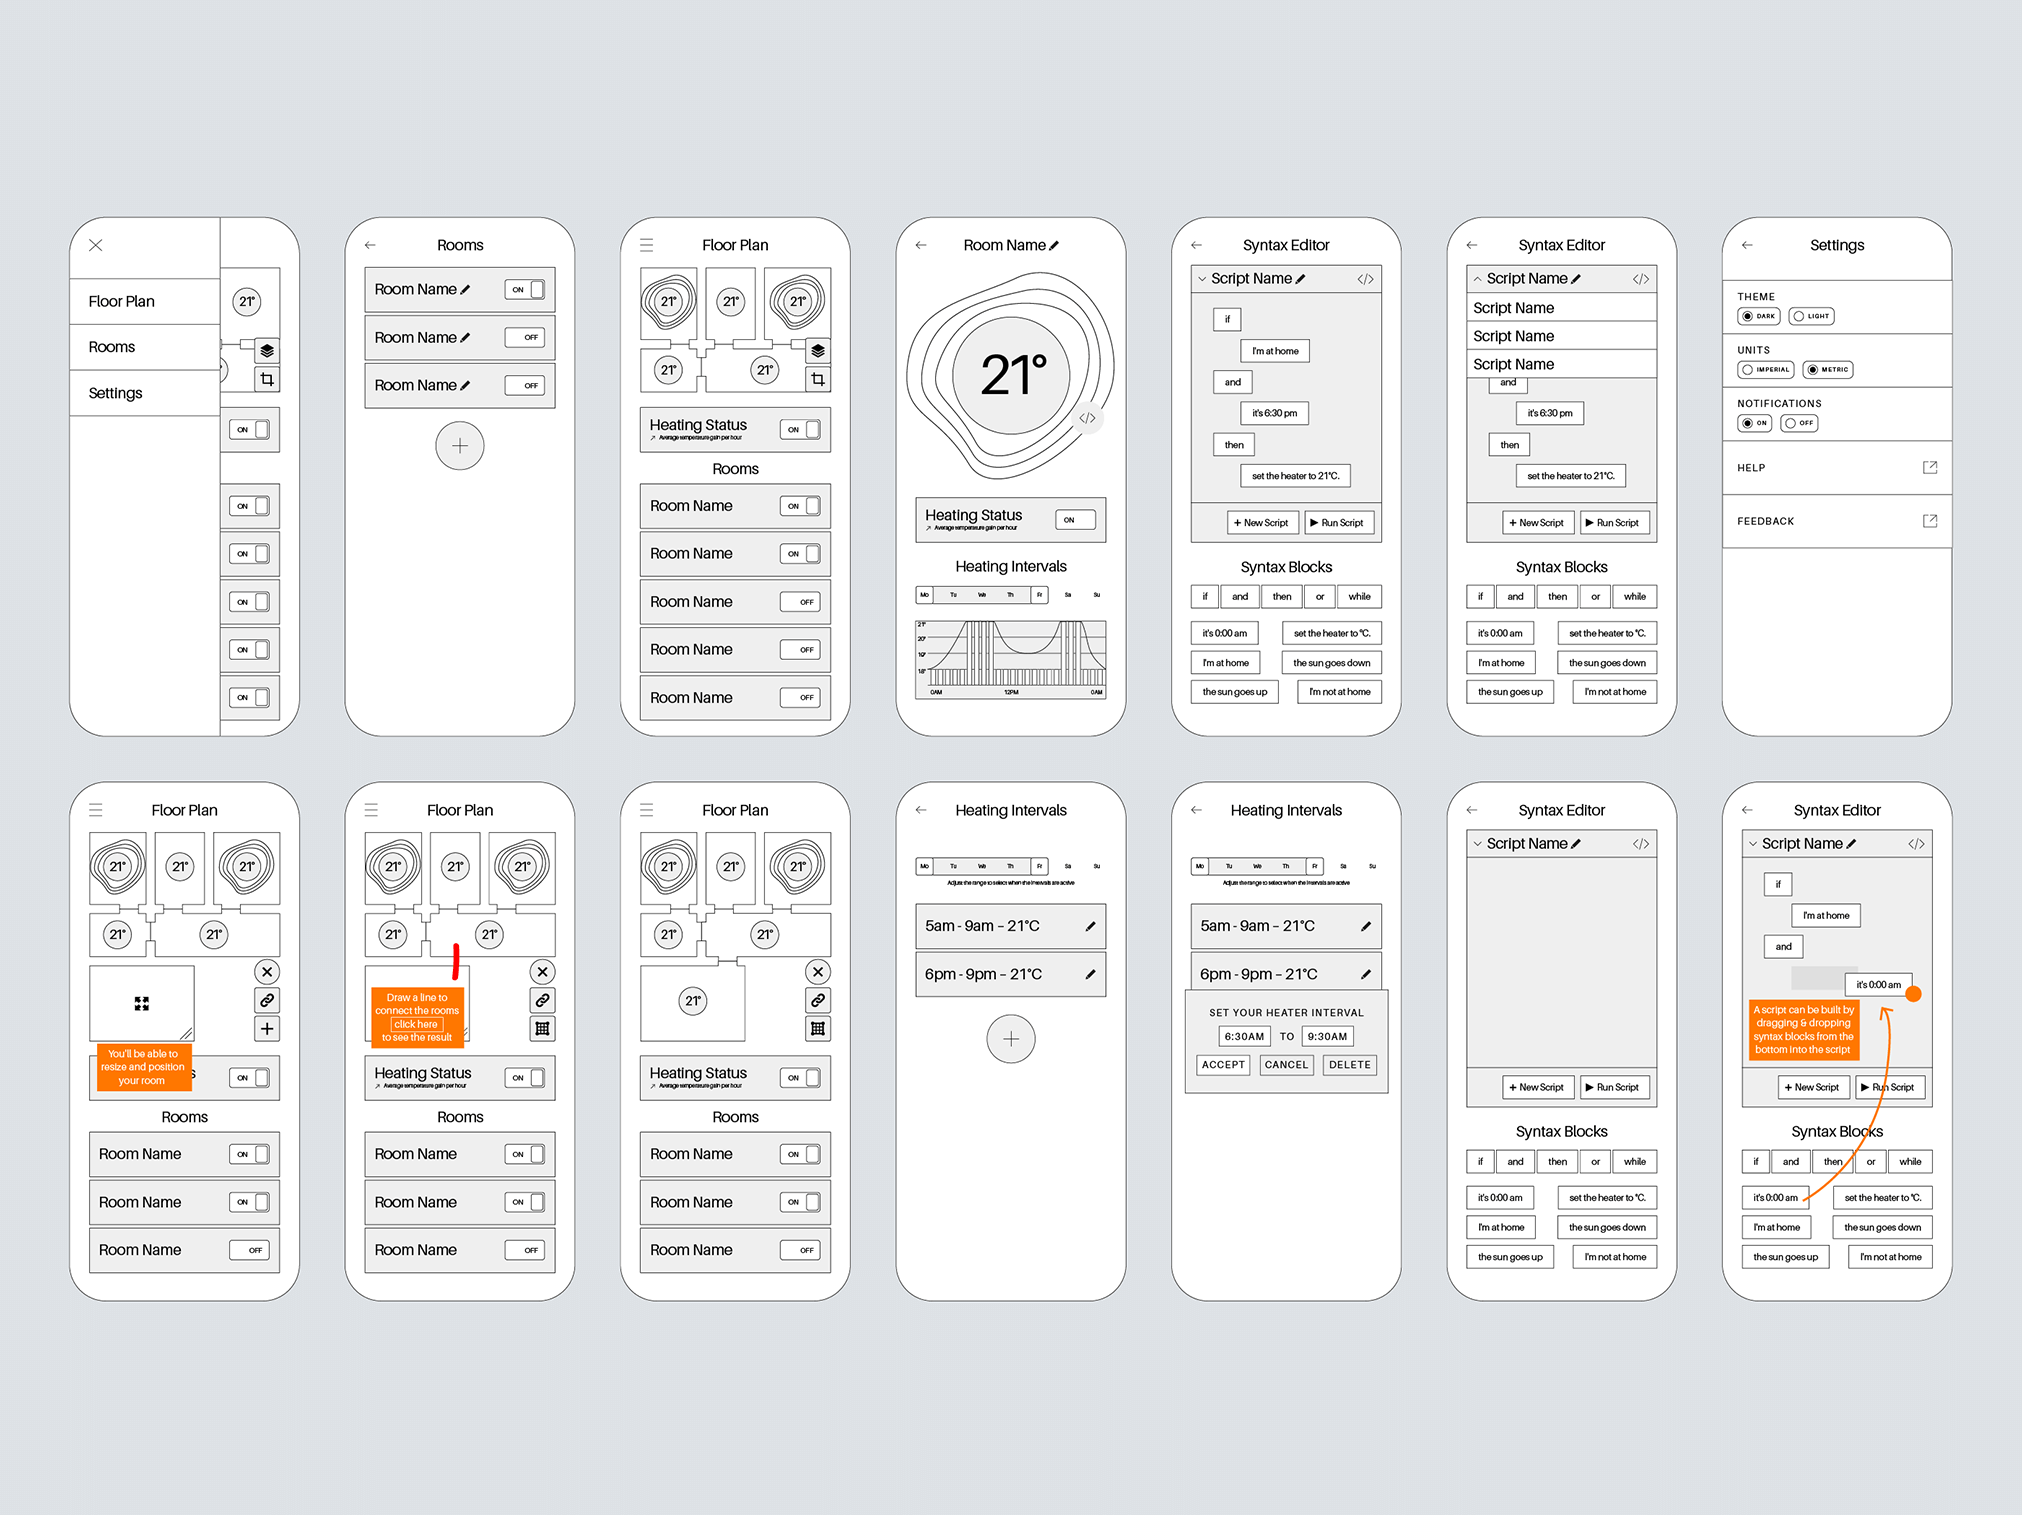
Low-fidelity wireframes allow me to prototype features very quickly.
With the help of Figma or similar tools I can make them interactive
and test the designs on real users.
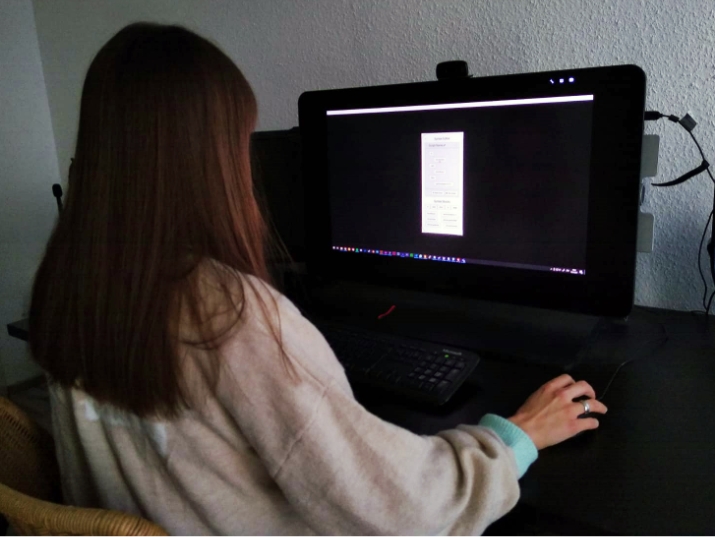
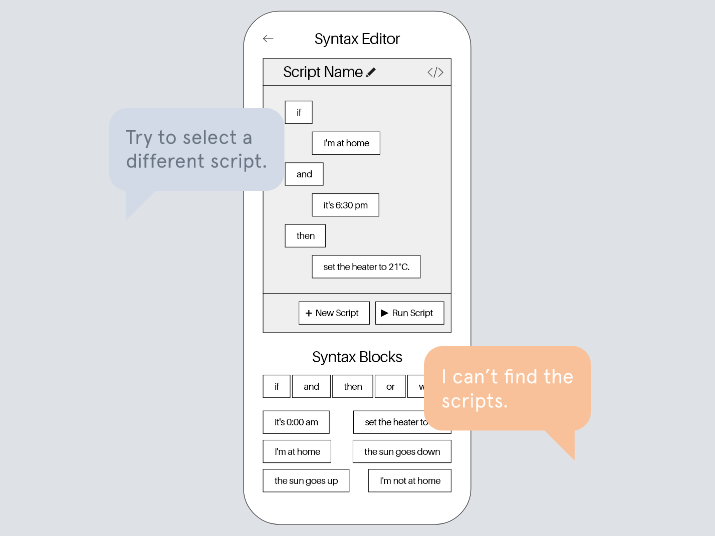
In moderated testing-sessions I let the users solve given tasks
while they are commenting on their experience with the product.
I record the process and look for pain points the user might be
facing and iterate on them afterwards.
Finding a visual language and putting it all together.
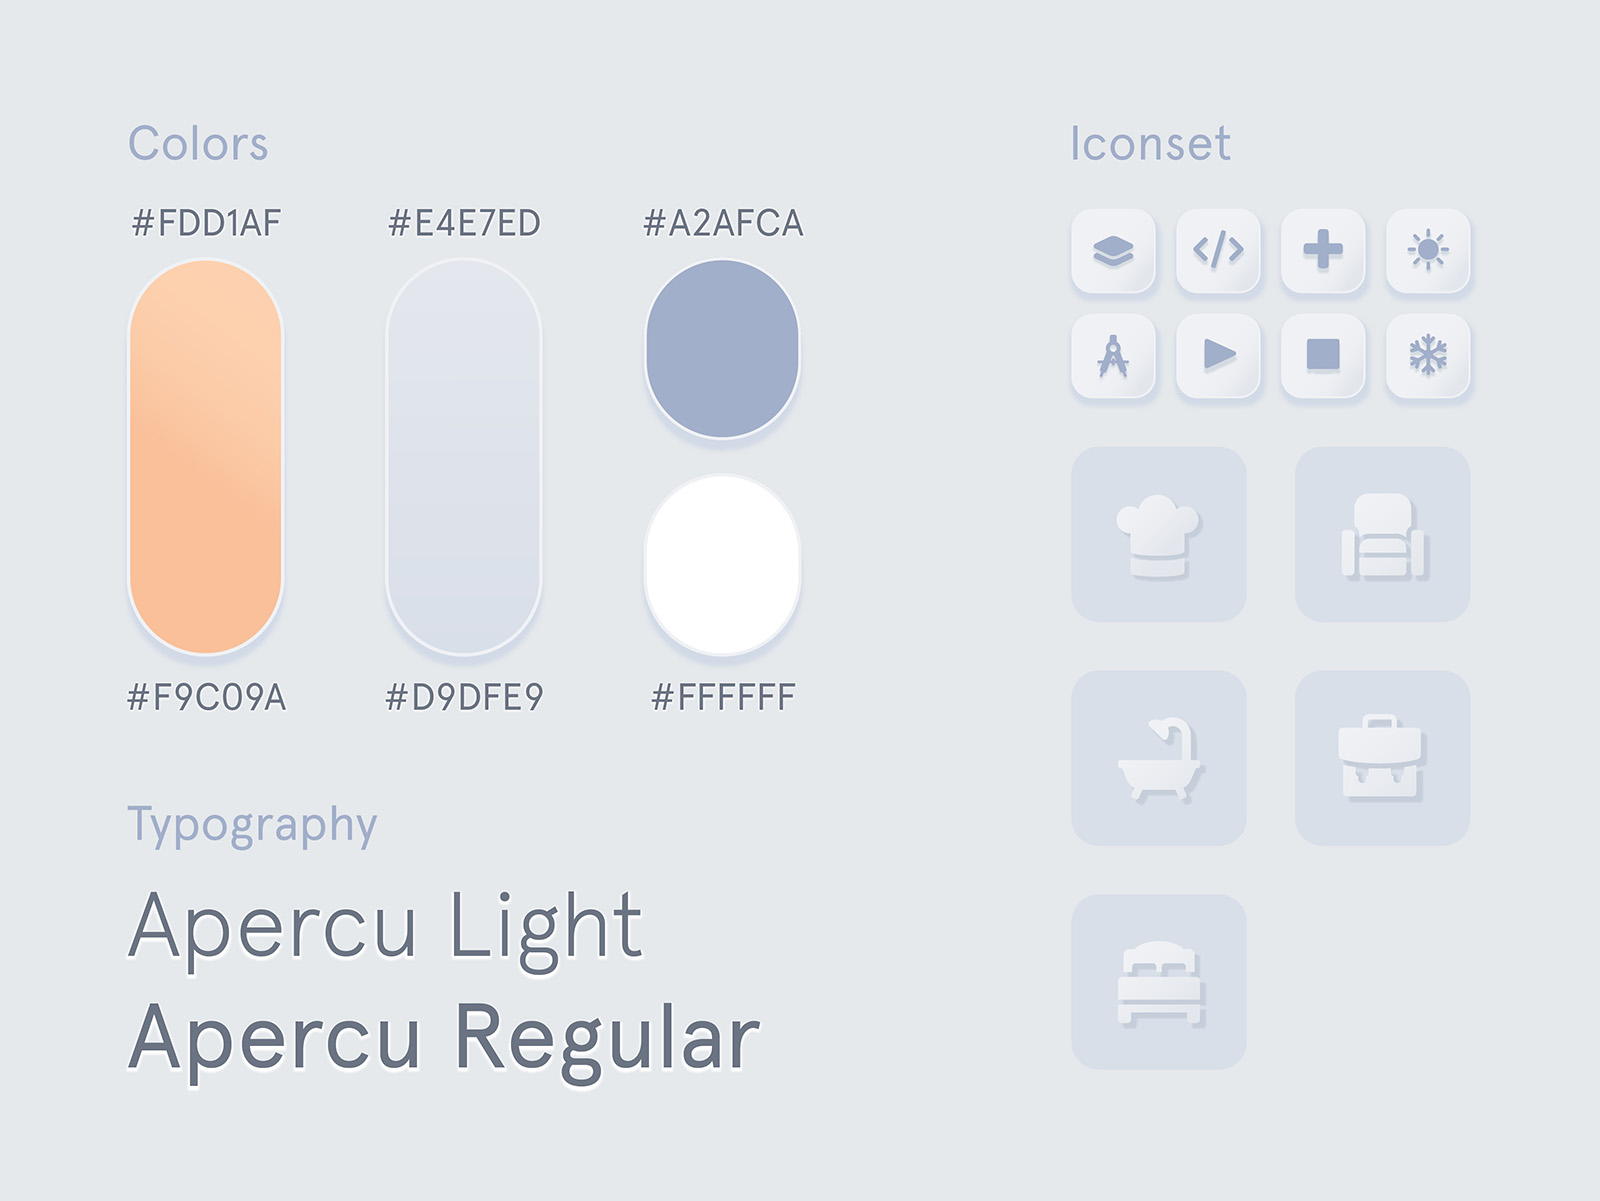
A quick-reference sheet of the colors, fonts and icons used in the design.
Once the groundwork is set, I move into refining the visual details of the design. For this project, the design system revolves around a contrast between cool greys and warm orange tones. The orange shades highlight interface elements related to heating status or relevant actions. I chose Apercu as the typeface because it perfectly matches the clean, approachable aesthetic I aimed for. The icon set includes smaller icons, primarily used for action buttons, and larger icons that help users easily categorize their rooms.
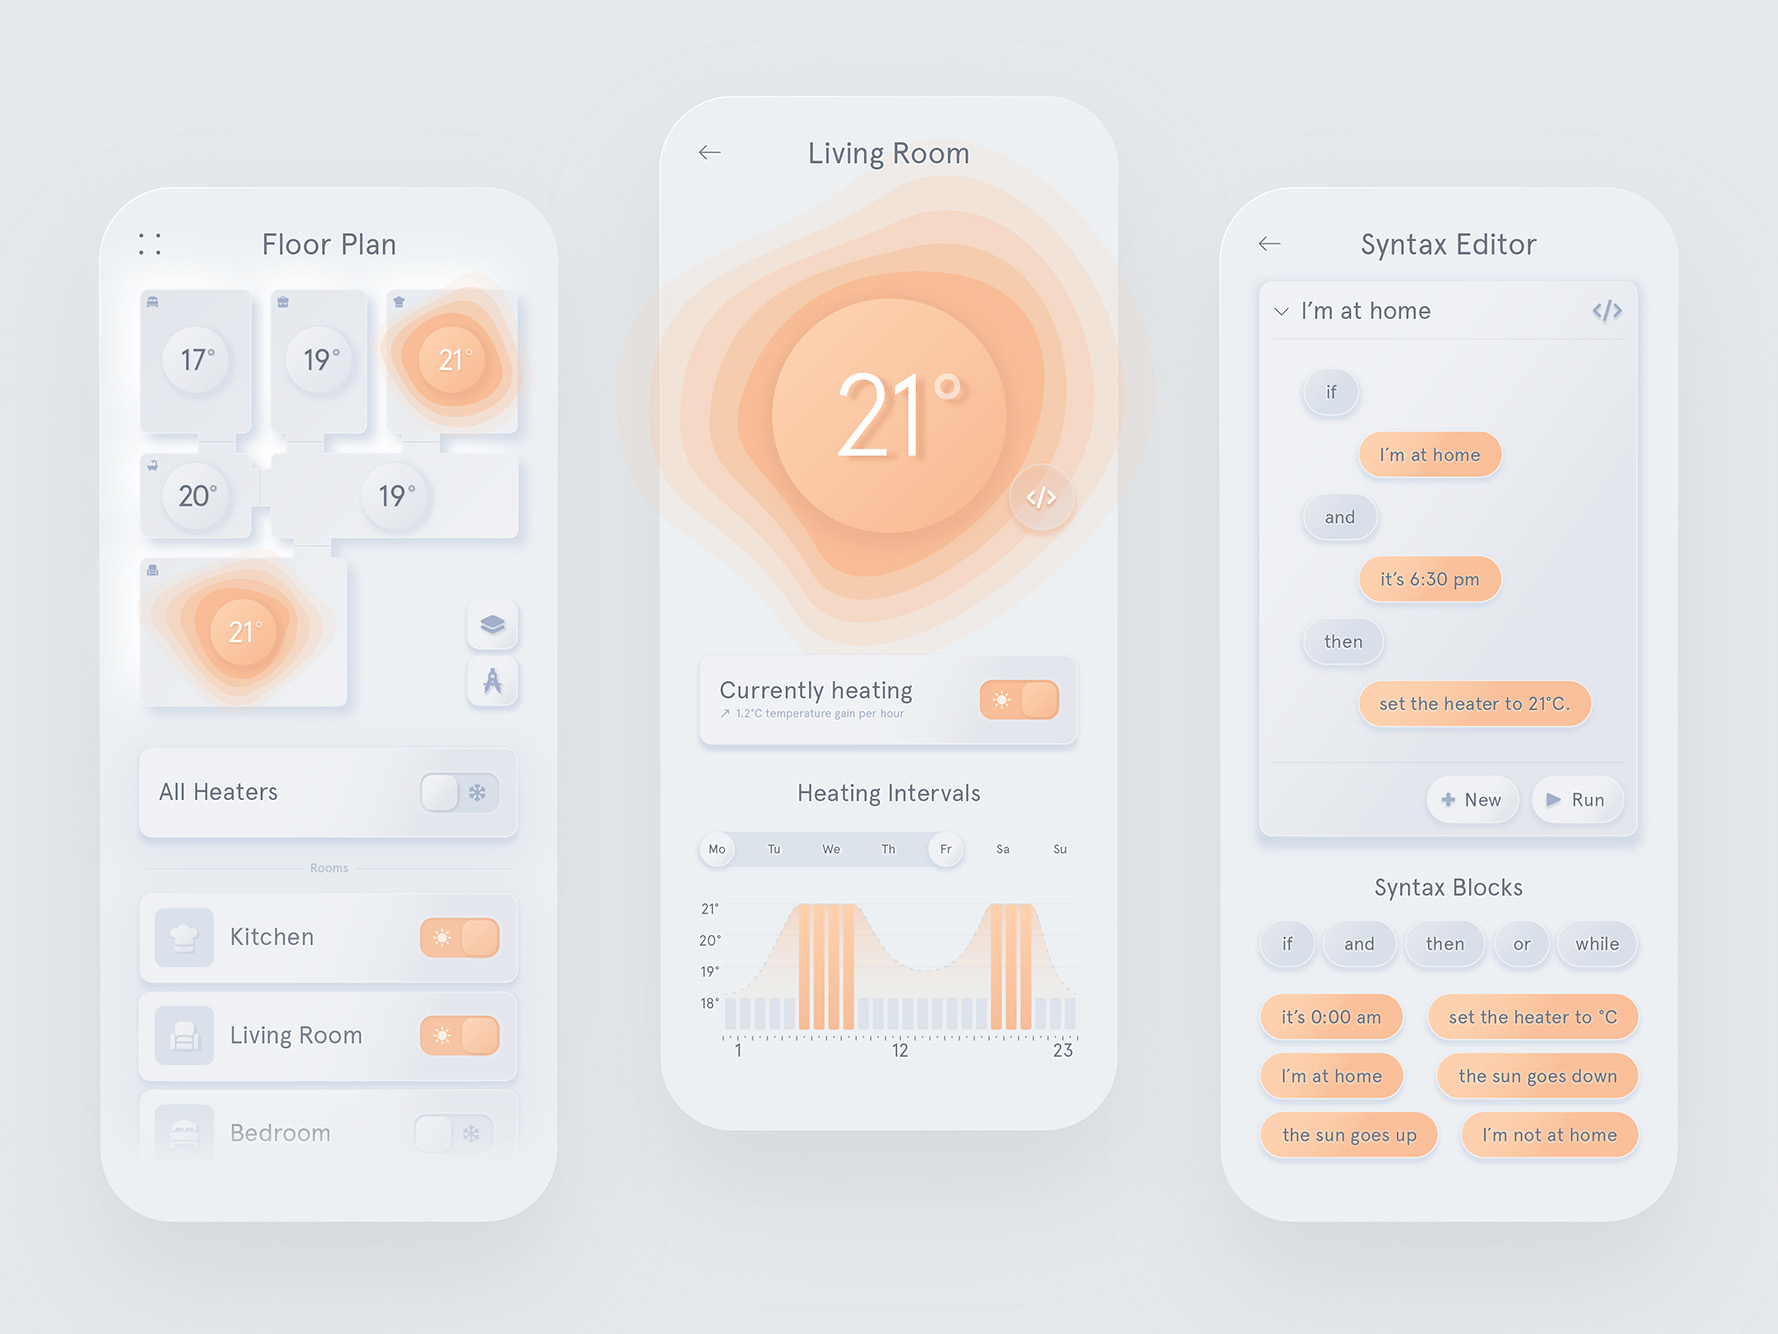
The three main-screens visualized in their final form.
Exemplary navigation through the main screens of the app.
The Floor Plan
The first thing you see when opening the app is the floor plan, because this is where you control the essentials.
It gives you a visual overview of each room on your current floor, showing heating statuses and room temperatures. Tapping a room takes you to its detailed view, where you can fine-tune individual settings. If your home has multiple floors, just tap the "layer" button in the bottom-right corner to switch between them.
You can customize your floor plan by activating "architect mode" (the dividers icon, also bottom-right). This lets you add rooms, resize and move them around, and connect rooms by drawing bridging lines between them. I've illustrated the full process clearly in the wireframe.
To quickly control all heaters at once, there's a master switch to turn every heater on or off simultaneously. Below this master control, you'll find a handy list of individual rooms with their own switches. Tapping any of these rooms also opens its detailed view.
The Room View
The room view prominently shows the current temperature, visually complemented by animated waves symbolizing heat radiating from the radiator. These waves only appear when the heater is active. To the lower right of the temperature display is a button that takes you to the syntax editor, where you can set precise heating routines. Below the temperature, you'll find a simple on/off switch for the heater and some additional room temperature information.
In the lower section, you can manage heating schedules, setting intervals individually per day or for multiple days simultaneously.
The Syntax Editor
"Syntax Editor" might sound technical, but it's simply the area where you can easily create custom heating routines for any room. To build a routine, just drag and drop "syntax blocks" from the bottom of the screen into the workspace above. These blocks come in two types: conditional operators (shown in grey), and conditions (in orange) which define when a routine triggers. To add a new routine, tap the "new" button, and to view your existing routines, simply tap the downward-arrow next to a routine's name.
Conclusion
Giving users clear visibility into heater status and providing powerful yet simple routine-building tools can significantly reduce unnecessary energy use. At the same time, these improvements add convenience: rooms automatically reach desired temperatures exactly when needed, thanks to precise measuring and smart calculation of heating times.
The syntax editor mimics programming logic but stays user-friendly with its straightforward drag-and-drop interface – no coding experience required.
Next case study
